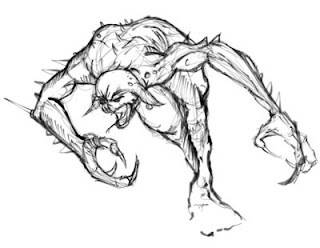
Step 1. ( THE SKETCH ) I usually create a sketch or mock up drawing using whatever is near me at the time be it a sketch pad, or Photoshop. I am constantly on Photoshop so I find that it is easy for me to create a sketch there, and it helps me get used to my tablet. I create a layer so that it is separate from the " BACKGROUND " layer. It comes in handy later.
The sketch should be lose and free of any kind of traditional training. Don't worry too much about anatomy and size, just lay down the basic idea! This is the time to get whats in your head and translate it to paper or in this case to a digital file. So for me I sketch freely, a lot of the time my sketches look very rudimentary. But again it's ok with me.
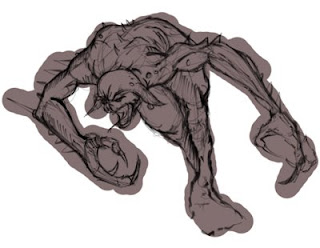
Step 2. ( COLOR ) Basic color. Basic color is exactly that a solid color that is applied underneath your sketch layer. So to do this I create a another layer, on this layer I start to think about how I will LIGHT the subject. From the top, side, under, it varies. I play around with this later on, but for now I just always use top light.
Step 3. ( LIGHTING ) So I use the DODGE, and BURN tool in Photoshop to do this. I set the OPACITY at 20-40% and FLOW to 50% this gives me a very nice set of dynamics, and it doesn't blow out my lighting. At this point you don't want to focus on anything else but getting your subject to have the correct source of light and cast the shadows in the right direction as well. And so here we have the subject being lit from the top meaning that all the light is hitting the subjects Head, Back For arms, etc. and the shadows should be the opposite of what you light. This is real important to nail down, it's the difference between a life like subject and a cartoon type subject. I have struggled very much with this in the past. So to help me I practice sketching objects in different lighting situations.
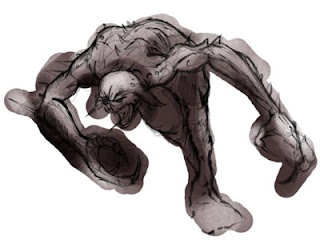
Step 4. ( COLOR AND TEXTURE ) Is simply that on the same COLOR layer that I previously applied the lighting on, I start applying color. At this point I select a Charcoal type brush set the OPACITY to 10-20% FLOW at 50% and start applying color. I like to blend different colors to give the illusion of texture on Flesh. This varies from subject to subject as do the brushes, but I always use the standard Photoshop brushes. I have played around with custom brushes but that is for another Tutorial. Once the color is down we can start thinking about detail. At this point you need to decide is this a concept or a finished piece.
For the sake of this tutorial, I am treating this as a concept sketch. So I will keep it lose and the level of detail will be minimal, as to save time I will produce about 20 of these little sketches in a few hours. So the goal here is to remember your training and produce a comprehensible concept(s) in a short amount of time.
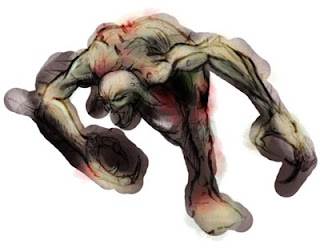
Step 5. ( CLEAN UP ) This part is a no " brainer " it is time to clean up the sketch. I set my standard solid round ERASER tool at 60% OPACITY and 50% FLOW this is simply preference. For me the settings above are a bit of my style, I like to have them look like sketches on paper even tho they were digitally created. So its up to you.
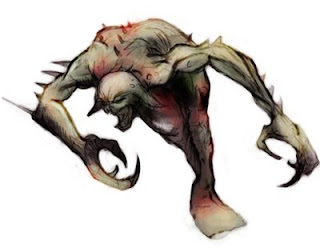
And here you can see the final sketch with COLOR, LIGHTING, DETAIL, and CLEAN UP. And at this point I save out the PSD file and start on another one. Usually when I sketch in black and white I tend to do several so I have about 20 different versions of this monster so the process is easy.
I hope this tutorial has been helpful and you have learned from it. Good luck and remember if it isn't fun then your in the wrong profession!
Good day all.
